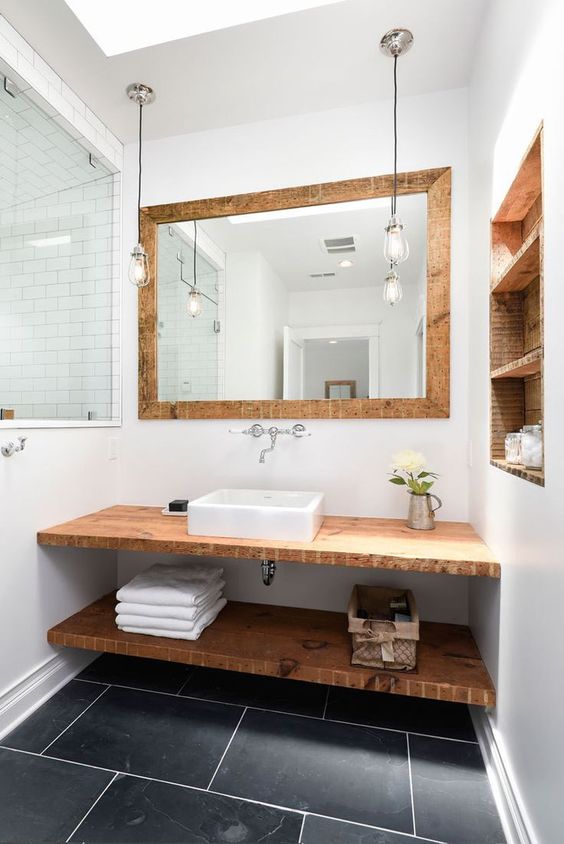
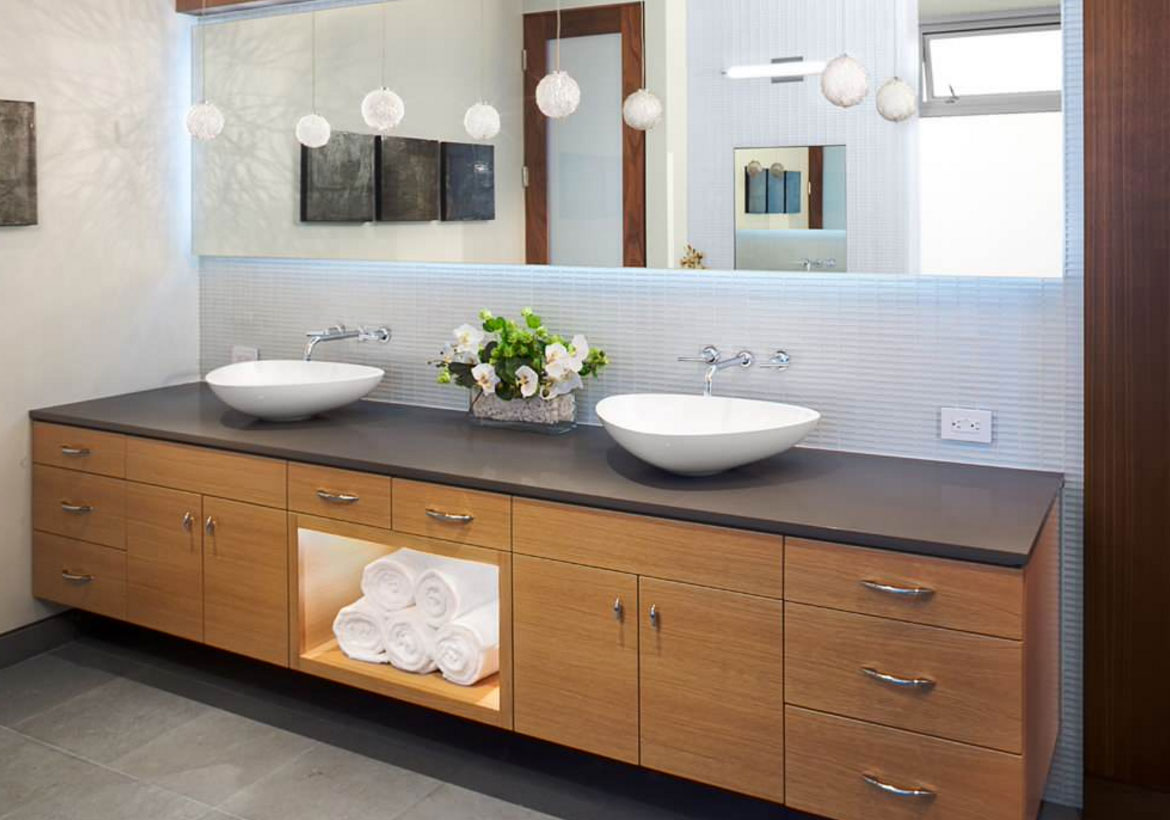
DIY Floating Bathroom Vanity Cabinet Plans

This comprehensive guide provides detailed plans, step-by-step instructions, and expert tips for creating a custom floating vanity cabinet that perfectly fits your style and budget.
Keywords: DIY floating bathroom vanity, floating vanity plans, bathroom vanity cabinet plans, build a floating vanity, DIY bathroom remodel, custom bathroom vanity, floating shelf vanity, bathroom storage solutions, woodworking plans, bathroom renovation, budget-friendly bathroom, modern bathroom design, minimalist bathroom design, floating vanity tutorial
Introduction:
Tired of cramped bathroom counters and a lack of storage? A floating bathroom vanity offers a sleek, modern solution, maximizing space and adding a touch of sophisticated style. While pre-made vanities can be expensive, building your own DIY floating bathroom vanity is a rewarding project that saves money and allows for complete customization. This comprehensive guide provides detailed plans, step-by-step instructions, and expert tips to help you create the perfect floating vanity for your bathroom. We’ll cover everything from choosing the right materials to installing the finished product, ensuring a successful and beautiful outcome.
Table of Content
I. Planning Your DIY Floating Bathroom Vanity:
Before you even pick up a saw, meticulous planning is key to a successful project. This involves several crucial steps:
A. Measuring Your Space:
Related Article DIY floating bathroom vanity cabinet plans
- two tone kitchen cabinets doors
- Custom Corner Cabinet Designs For Awkward Spaces
- How To Fix Sagging Cabinet Doors Without Replacing Hinges
- Cherry Cabinets with White Quartz Countertops: A Perfect Match Made in Heaven
- Brown Granite with White Cabinets: A Classic and Chic Design Combination
Accurately measuring your bathroom space is paramount. Consider:
- Available Wall Space: How much horizontal space do you have for your vanity? Measure the width and height available, accounting for any existing plumbing or electrical outlets.
- Sink Dimensions: If you’re incorporating a sink, measure its dimensions precisely. Ensure there’s enough counter space around the sink for comfortable use.
- Desired Depth: How deep do you want your vanity to be? A shallower vanity will save space, but a deeper one offers more storage.
- Cabinet Height: Determine the ideal height for your vanity based on your preferences and the height of your bathroom fixtures.

B. Choosing Your Materials:
The materials you choose will significantly impact the look, durability, and cost of your vanity. Popular choices include:

- Wood: Hardwoods like oak, maple, and cherry offer durability and a luxurious look. Softwoods like pine are more affordable but require more care. Consider pre-finished wood for a quicker project.
- Plywood: A cost-effective alternative to solid wood, plywood provides strength and stability. Choose a high-quality plywood with a smooth finish for a professional look.
- MDF (Medium-Density Fiberboard): MDF is a smooth, dense material ideal for painting. It’s less expensive than hardwood but can be more susceptible to moisture damage. Ensure you use a moisture-resistant sealant.
- Countertop Material: Options include granite, marble, quartz, laminate, and even butcher block. Consider durability, maintenance, and your budget.
C. Designing Your Vanity:
Sketch out your vanity design, including dimensions, storage options (drawers, shelves), and the location of the sink (if applicable). Consider the following design elements:
- Style: Do you prefer a minimalist, modern design or a more traditional look?
- Storage: How much storage do you need? Plan for drawers, shelves, or a combination of both.
- Hardware: Choose knobs, pulls, and hinges that complement your overall design.
- Finishing: Will you stain, paint, or use a clear finish on your vanity?
II. Building Your DIY Floating Bathroom Vanity: A Step-by-Step Guide:
This section provides a detailed walkthrough of the construction process. Remember to always prioritize safety and use appropriate safety gear, including eye protection and dust masks.
A. Cutting the Wood:
Using your design plans and precise measurements, cut the wood pieces for the cabinet box, shelves, and countertop supports. Use a miter saw for accurate cuts.
B. Assembling the Cabinet Box:
Assemble the cabinet box using wood glue and screws. Ensure all joints are tight and square. Use clamps to hold the pieces together while the glue dries.
C. Adding Shelves and Drawers (Optional):
If your design includes shelves or drawers, install them now. Use appropriate drawer slides and hardware.
D. Attaching the Countertop Supports:
Securely attach the countertop supports to the cabinet box. These supports will hold the countertop in place.
E. Installing the Countertop:
Carefully place the countertop on the supports. Ensure it’s level and properly aligned. Use silicone sealant to prevent water damage.
F. Finishing the Vanity:
Sand all surfaces smooth, paying attention to corners and edges. Apply your chosen finish – stain, paint, or clear coat – following the manufacturer’s instructions. Allow ample drying time between coats.
G. Installing the Sink (If Applicable):
If you’re incorporating a sink, install it according to the manufacturer’s instructions. Use silicone sealant to create a watertight seal.
H. Installing the Hardware:
Install the knobs, pulls, and hinges.
III. Installing Your DIY Floating Bathroom Vanity:
This final step requires careful planning and execution.
A. Locating Wall Studs:
Use a stud finder to locate wall studs. This is crucial for securely mounting the vanity to the wall.
B. Mounting the Vanity:
Use appropriate mounting hardware, such as heavy-duty screws and wall anchors, to securely attach the vanity to the wall studs. Ensure the vanity is level and securely fastened.
C. Plumbing and Electrical Connections (If Applicable):
If you’re installing a sink, connect the plumbing lines. If there are electrical outlets near the vanity, ensure they are properly grounded and protected.
D. Final Touches:
Caulk any gaps between the vanity and the wall to prevent water damage. Clean the vanity thoroughly and enjoy your new custom creation!
IV. Advanced Techniques and Customization Options:
Take your DIY floating vanity to the next level with these advanced techniques:
- Incorporating Lighting: Add under-cabinet lighting for a modern and functional touch.
- Adding a Mirror: Integrate a mirror into the design for a cohesive look.
- Using Unique Hardware: Choose unique knobs and pulls to personalize your vanity.
- Creating Custom Cabinet Doors: Design and build your own cabinet doors for a truly unique look.
- Adding Soft-Close Hinges and Slides: Enhance functionality and reduce noise with soft-close hardware.
V. Troubleshooting and Tips for Success:
- Pre-drill holes: Always pre-drill holes before screwing into wood to prevent splitting.
- Use quality materials: Investing in quality materials will result in a more durable and long-lasting vanity.
- Plan for expansion and contraction: Wood expands and contracts with changes in humidity. Account for this in your design and construction.
- Protect your work surface: Use a drop cloth or other protective covering to protect your work area.
- Take your time: Don’t rush the process. Careful planning and execution will result in a beautiful and functional vanity.
VI. Conclusion:
Building your own DIY floating bathroom vanity is a rewarding project that allows you to create a custom piece that perfectly fits your style and budget. By following these detailed plans and instructions, you can transform your bathroom into a stylish and functional space. Remember to always prioritize safety and take your time to ensure a successful outcome. With a little patience and effort, you can enjoy the satisfaction of creating a beautiful and functional piece for your home. Now go forth and conquer that bathroom clutter!


