
DIY Garage Shelves Using Recycled Materials

Save money and reduce waste while creating custom storage solutions. Learn about material sourcing, design, construction, and finishing.
Keywords: DIY garage shelves, recycled garage shelves, repurposed garage shelves, pallet shelves, upcycled garage shelves, garage organization, DIY storage, recycled materials, sustainable DIY, eco-friendly DIY, free garage shelving, cheap garage shelving, building garage shelves, garage makeover, woodworking projects, pallet woodworking
Introduction:
A cluttered garage is a homeowner’s nightmare. Tools scattered haphazardly, boxes piled high, and forgotten items lurking in the shadows – it’s a recipe for frustration and wasted time. But what if you could conquer this chaos and create a functional, organized space without breaking the bank? The answer lies in embracing the power of DIY and recycled materials. This comprehensive guide will walk you through the process of building sturdy, attractive garage shelves using reclaimed materials, transforming your garage from a storage graveyard into a well-organized workshop or storage space. Not only will you save money, but you’ll also contribute to a more sustainable lifestyle by reducing waste and repurposing materials.
Table of Content
Part 1: Sourcing Your Recycled Materials – The Treasure Hunt Begins!
The beauty of this project lies in its resourcefulness. Forget expensive lumber; your garage shelves can be crafted from a variety of readily available, recycled materials. Here are some prime sources:
- The Beauty and Durability of Iron Ore Garage Doors
- Garage Door Spring Weight Calculator: A Comprehensive Guide
- Retractable Garage Workbench Designs For Small Spaces
- 12 x 10 garage door
- Transforming Your Unfinished Basement into a Functional Laundry Room
-
Pallets: These ubiquitous wooden platforms are a treasure trove for DIY enthusiasts. Look for sturdy pallets made of hardwood (avoid softwood, which is more prone to damage). Inspect them carefully for any signs of rot, pests, or excessive damage. Many businesses discard pallets regularly, so ask local retailers, construction sites, or breweries if you can salvage some. Remember to check local regulations regarding pallet reclamation.
Reclaimed Lumber: Salvage yards, demolition sites, and even your own home (old fences, decking, etc.) can yield valuable lumber. Look for pieces with interesting character, knots, and variations in color – these imperfections can add unique charm to your shelves. Ensure the wood is structurally sound and free from rot or insect infestation.
-
Shipping Crates: Similar to pallets, sturdy wooden shipping crates can be repurposed into attractive and functional shelves. These often feature thicker planks than pallets, offering greater strength and durability.
-
Metal Shelving: Don’t overlook the potential of recycled metal. Look for discarded shelving units at flea markets, garage sales, or online marketplaces. A little cleaning and repainting can transform old metal shelves into a stylish and functional addition to your garage.
-
Reclaimed Pipes and Fittings: For a truly industrial look, consider using reclaimed metal pipes and fittings to create a unique shelving system. These can be sourced from salvage yards or online marketplaces specializing in industrial materials. Remember to ensure the pipes are clean and free from rust or corrosion before use.

Related Article DIY garage shelves using recycled materials

Part 2: Designing Your Garage Shelves – Planning for Success
Before you start hammering and sawing, careful planning is crucial. Consider these factors:
-
Garage Dimensions: Measure your garage space meticulously to determine the optimal size and placement of your shelves. Consider the available wall space, ceiling height, and any obstructions (doors, windows, pipes, etc.).
-
Weight Capacity: Determine the weight you anticipate storing on each shelf. This will influence your choice of materials and the structural design of your shelves. Heavier items require sturdier shelves with stronger support.
-
Shelf Height and Depth: Consider the items you’ll be storing. Taller shelves are suitable for storing larger items, while shallower shelves work well for smaller objects. Varying shelf heights can enhance functionality and organization.
-
Shelf Style: Will you opt for simple, straight shelves, or incorporate more complex designs? Consider adding features like dividers, drawers, or hanging racks to optimize storage.
-
Sketching Your Design: Create a detailed sketch or diagram of your planned shelves, including measurements, material specifications, and construction details. This will serve as your blueprint throughout the building process.
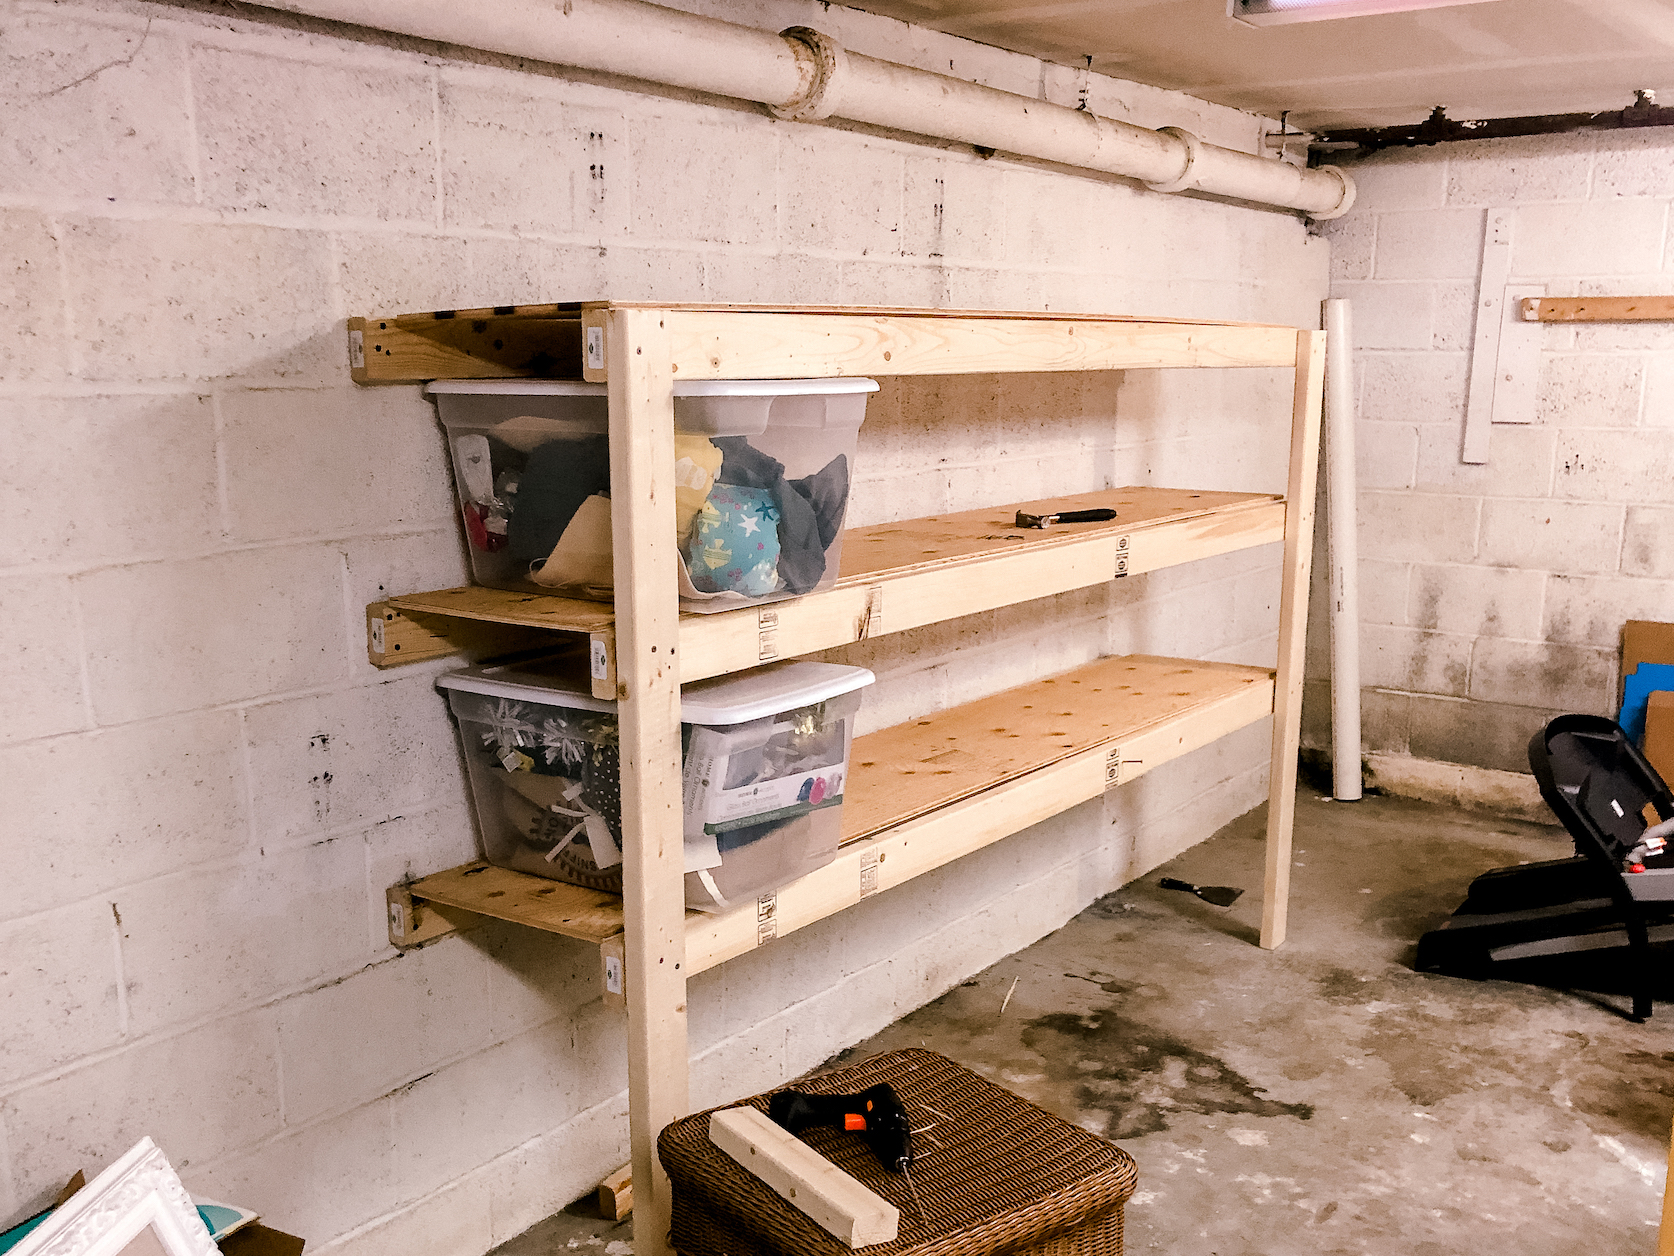
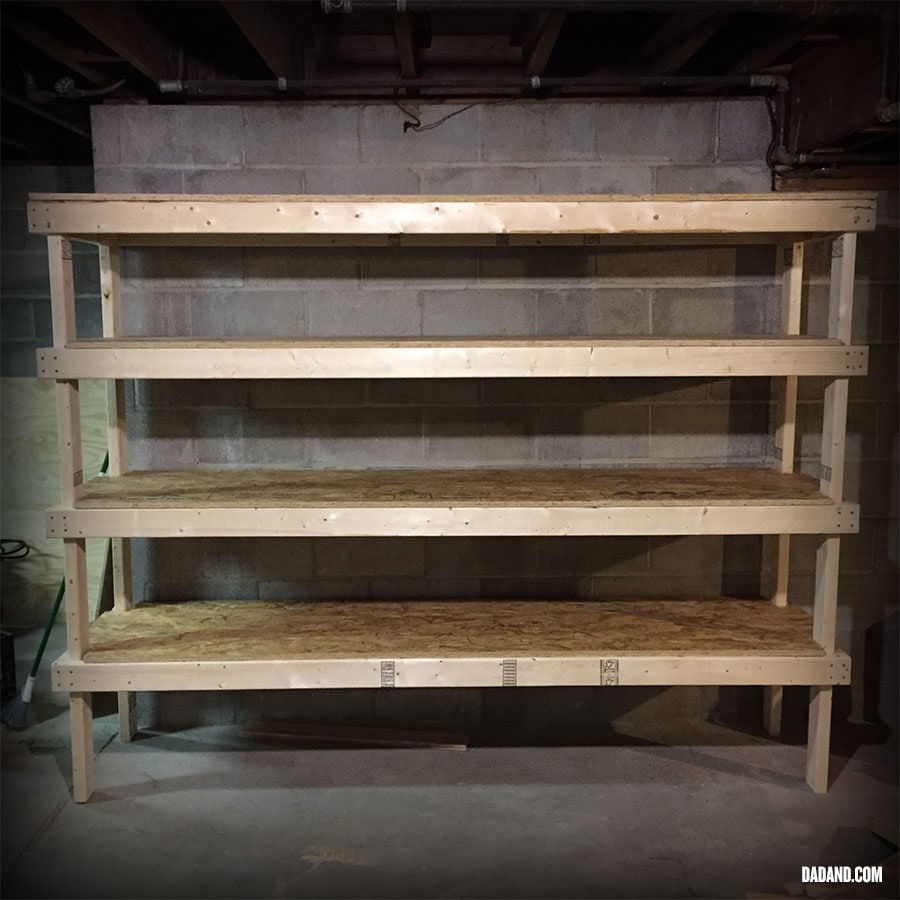
Part 3: Building Your Recycled Garage Shelves – A Step-by-Step Guide
This section provides a general guideline. The specific steps may vary depending on the materials and design you choose. Always prioritize safety and wear appropriate safety gear (safety glasses, gloves, dust mask).
Using Pallets:
-
Disassemble the Pallets: Carefully dismantle the pallets using a crowbar or hammer and pry bar. Remove any nails or staples. Inspect the planks for damage and discard any unusable pieces.
-
Clean and Sand: Thoroughly clean the planks with a wire brush or pressure washer to remove dirt, debris, and any loose wood fibers. Sand the planks smooth using progressively finer grit sandpaper.
-
Cut and Prepare the Wood: Cut the planks to the desired length using a saw (circular saw or hand saw). If necessary, cut the planks to create different shelf depths.
-
Assemble the Shelves: Use wood glue and screws to assemble the shelves. For added stability, consider using brackets or supports.
-
Finish the Shelves: Apply a sealant, stain, or paint to protect the wood and enhance its appearance. Choose a finish that is suitable for the garage environment (moisture-resistant, durable).
Using Reclaimed Lumber:
The process is similar to using pallets, but you’ll have more flexibility in design and material selection. You might need to cut and shape the lumber more extensively depending on your design.
Using Metal Shelving:
If you’re using recycled metal shelving, the process will primarily involve cleaning, repairing any damage, and potentially repainting or refinishing the shelves.
Part 4: Finishing Touches and Safety Considerations
-
Finishing: Apply a suitable finish to protect your shelves from moisture, dust, and wear. Consider using a durable paint, stain, or sealant appropriate for the garage environment.
-
Safety: Securely attach your shelves to the wall studs using appropriate fasteners. This will prevent the shelves from collapsing under heavy loads.
-
Organization: Once your shelves are installed, organize your items effectively. Use storage bins, labels, and other organizational tools to maximize space and maintain order.
Part 5: Advanced Techniques and Design Ideas
-
Floating Shelves: Create a sleek, modern look with floating shelves. This requires careful planning and precise measurements to ensure secure attachment to the wall.
-
Integrated Workbenches: Combine your shelves with a built-in workbench for a truly functional workspace.
-
Customizable Dividers: Add custom dividers to create compartments for specific items, keeping everything neatly organized.
-
Lighting: Improve visibility and functionality by incorporating lighting into your shelving system.
-
Vertical Storage: Maximize vertical space by adding tall shelves or utilizing wall-mounted storage solutions.
Conclusion:
Building DIY garage shelves from recycled materials is a rewarding project that combines creativity, sustainability, and significant cost savings. By following this guide, you can transform your cluttered garage into an organized and functional space. Remember to prioritize safety, plan carefully, and enjoy the process of creating custom storage solutions tailored to your needs. The satisfaction of conquering garage clutter and creating something beautiful from discarded materials is unparalleled. So, start your treasure hunt for recycled materials and embark on your garage organization journey today!


